Showing posts with label friends. Show all posts

4.04.2012

A Real Woman: Lauren from Living Loved


I am so honored to have the lovely Lauren here with us today. She is awesome to say the least. She is from Australia. Which is awesome. She doesn't know it yet but I am going to visit her one day and we are going to laugh and craft and talk and have coffee. Ok...stalker status.
            ___________________________________________________________________


I am not a housewife. I am a single, twenty-one year old lover of Christ. I blog at Living Loved. When Savannah asked me to post for this project I thought it was an excellent idea! That's so much for having me Sav :) Photobucket The point of this post is simple, but incredibly powerful. Show Grace when blogging. There are many women, of many different faiths that have blogs. So how do we make our blogs reflect beliefs that are Christian? How do we allow readers to acknowledge what makes Christian women's blogs different? There is an anecdote that goes something along the line of this:
Years ago, a large international conference was held of religious leaders from around the world. In the midst of the conference, a debate began about what it was that set Christianity apart from other religions.
Some argued that it was God coming in the flesh that set Christianity apart from other religions. They decided that wasn’t it, because other religions claimed that their gods came in human form. Some argued that it was love, or sacrifice, or the resurrection, or one thing or another; each idea being shot down. Finally, C. S. Lewis, having arrived late, walked into the conference and asked what all the noise was about. When told they were discussing what it was that set Christianity apart from all other religions, he said, “That’s easy. It’s grace.”  source
Christianity is set apart because of Grace.
When I think about what I should or should not blog about... I remember that the most important thing is being real with readers and continually reminding them of God's grace as much as I need to remind myself sometimes.  That's why it's important to post about the messy, the sad, the frustrating.. because Grace has always  and will always cover us and spreading this message can change lives. Nothing we do will ever change how much our Lord loves us.  So when you've had a bad day and all you want to post about it 'today was rough' or 'today did not go how I planned' then post about it! AND declare His continued faithfulness, renewal and amazing grace, too. We need to be imperfect examples so that His perfection shines through.

3.29.2012

Our weekend in the woods...

{Here we go!}
{This here is cow country}
{Tent is up!}
{Our little friend}
{drying rain soaked clothes!}
{Rolling waves}
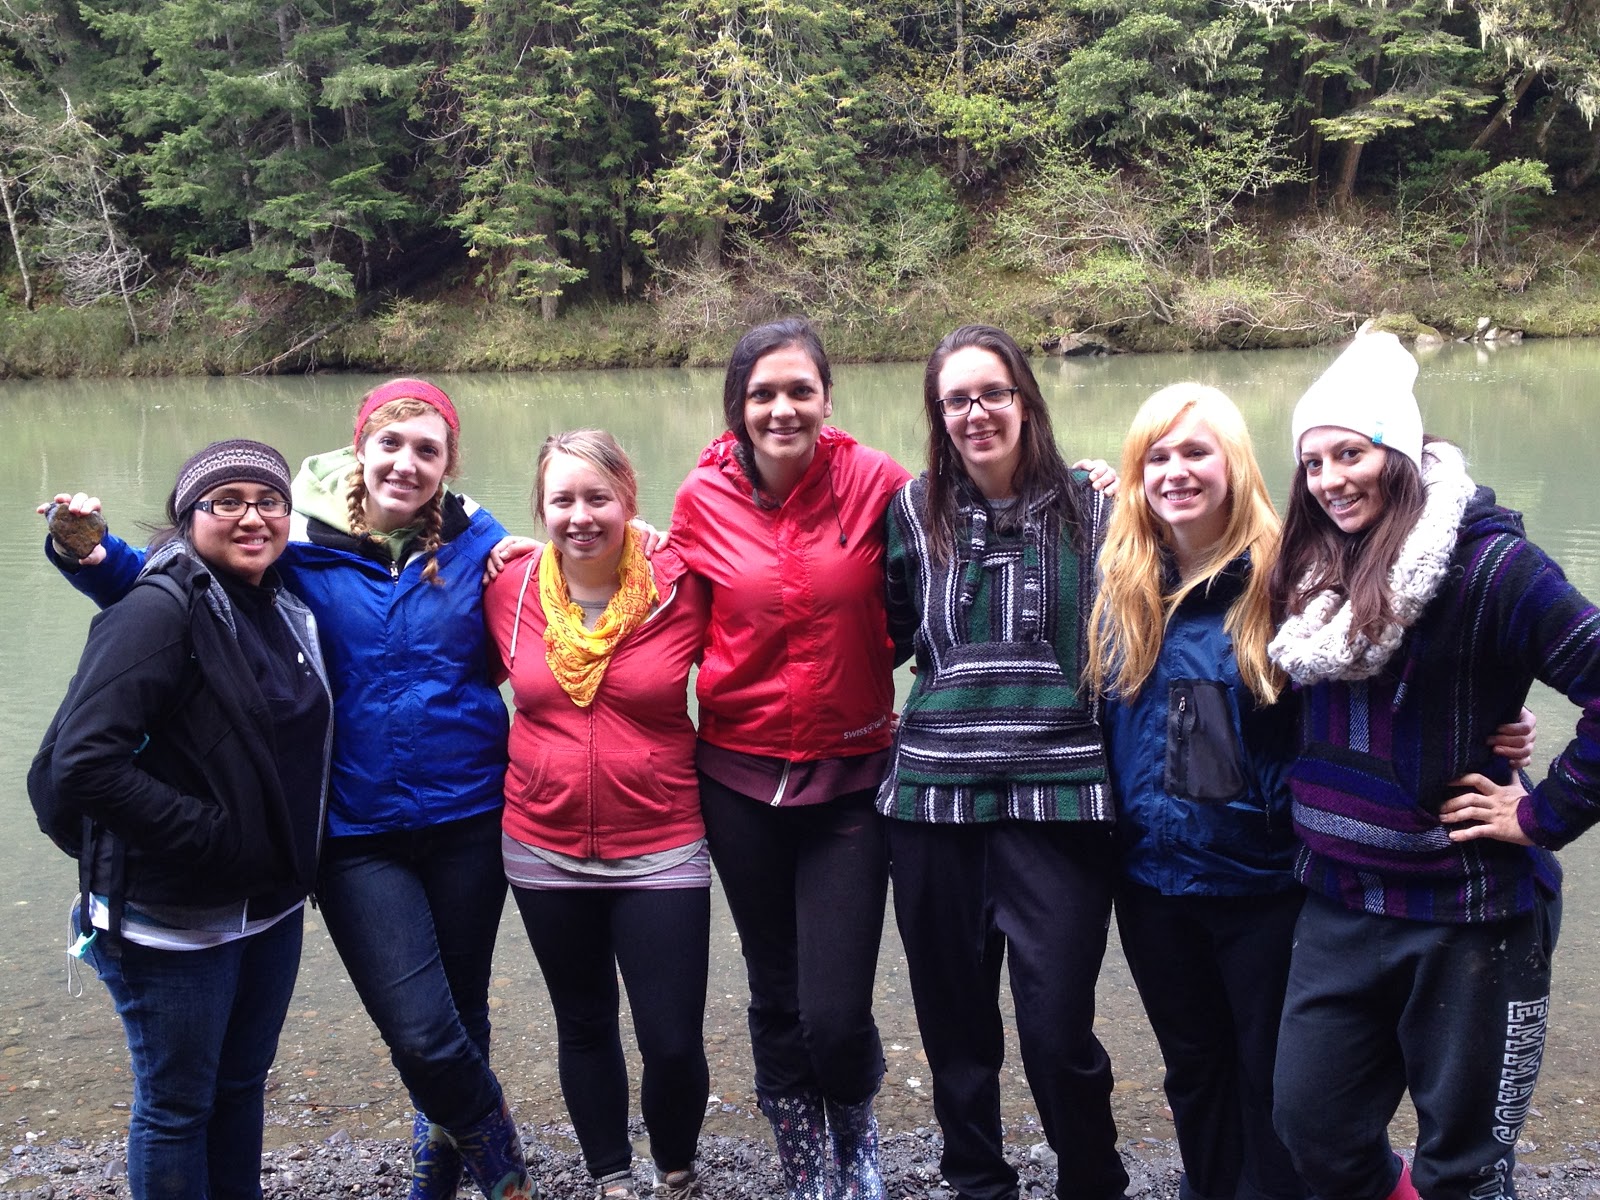
{All the girls!}
{Succulents}
{Fun with my love!}

Have any fun adventures this weekend?!

1.13.2012

Year in Review...a little late

So much happened this year. And that is an understatement!

The pictures are a little hard to see...but SO much happened that I had to try and fit them all in!!

2011 was a great year. A truly GREAT year. The best of my entire life so far!

Let's begin at the beginning shall we...

We love her to bits and pieces...can you tell?

Many friends got engaged, many friends got married, and many friends had babies.


My most favorite day of all! 


Had some fun vacations this year! SoCal, Philadelphia, Portland, Disneyland, Cabo, Puerto Vallarta, San Diego. We were very blessed in 2011! 

And to top it all off I started nursing school too.

Well it sure has been an amazing, incredible, whirlwind of a year...and I wouldn't have traded a single second!! Here is to a new year, that probably will not top this one...but I hope it come to a close second!


9.07.2011

Good food, good friends


We had our good friends over the other night, who just happen to be the parents of our ADORABLE god-daughter. We made dinner together and sat outside in the fading light to share a meal and good conversation. Pardon my cultural insensitivity but I love Indian summers and the warmth that lingers into Fall!

On the Menu

Appetizer:
Sliced tomatoes with fresh mozzarella, basil, topped with balsamic, extra virgin olive oil and cracked black pepper.

Main course:
Spinach salad with cranberries, candied pecans and bleu cheese (thank you Trader joes!), quinoa with Aleppo, salt and pepper, grilled Ahi tuna and chicken. My husband the grill master!

Dessert:
Brownies with vanilla bean ice cream with an espresso shot on top.
Vanilla bean ice cream with an espresso on top only for our favorite gluten free friend! : )


It was a great night, something we have to do more often!


Also don't forget to check out yesterday's post to win a Pinterest invite..and then be my friend and share your pinboards with me!


4.11.2011

Homemade Mallows + Grahams

On Saturday I hosted a girls day at my home, with two other wonerful ladies, Kat and Kryta.

We had a picnic outside, made some crafties, whipped up some DELICIOUS homemade S'MORES, grabbed some vietnamese food for dinner and then roasted our hard work in the back yard over a bonfire.

Crafties.

Bonfire.

The youngest member of girl's day...couldn't hack it and fell asleep. : )

Ok the moment you have been waiting for...

Homemade Grahams + Mallows


I got the graham recipe from Smitten Kitchen...love that blog.

Graham Ingredients

Makes 10 4 x 4.5-inch graham crackers
2 1/2 cups plus 2 tablespoons unbleached all-purpose flour (a swap of 1/2 cup with whole wheat flour or 1 cup whole wheat pastry flour works well here, too)
1 cup dark brown sugar, lightly packed
1 teaspoon baking soda
3/4 teaspoon kosher or coarse sea salt
7 tablespoons  unsalted butter, cut into 1-inch cubes and frozen
1/3 cup  mild-flavored honey, such as clover
5 tablespoons milk, full-fat is best
2 tablespoons pure vanilla extract

Topping (optional)
3 tablespoonsgranulated sugar
1 teaspoon ground cinnamon

Combine the flour, brown sugar, baking soda, and salt in the bowl of a food processor fitted with the steel blade or in the bowl of an electric mixer fitted with the paddle attachment. Pulse or mix on low to incorporate. Add the butter and pulse on and off on and off, or mix on low, until the mixture is the consistency of a coarse meal.

In a small bowl, whisk together the honey, milk, and vanilla extract. Add to the flour mixture and pulse on and off a few times or mix on low until the dough barely comes together. It will be very soft and sticky. Lay out a large piece of plastic wrap and dust it lightly with flour, then turn the dough out onto it and pat it into a rectangle about 1-inch thick. Wrap it, then chill it until firm, about 2 hours or overnight. Meanwhile, prepare the topping, if using, by combining the sugar and cinnamon in a small bowl and setting aside.

Divide the dough in half and return one half to the refrigerator. Sift an even layer of flour onto the work surface and roll the dough into a long rectangle about 1/8 inch thick. The dough will be sticky, so flour as necessary. Trim the edges of the rectangle to 4 inches wide. Working with the shorter side of the rectangle parallel to the work surface, cut the strip every 4 1/2 inches to make 4 crackers. *I used a ciclular cookie cutter with scalloped edges*

Place the crackers on one or two parchment-lined baking sheets and sprinkle with the topping. Chill until firm, about 30 to 45 minutes in the fridge or 15 to 20 minutes in the freezer. Repeat with the second batch of dough. Finally, gather any scraps together into a ball, chill until firm, and re-roll.
Adjust the oven rack to the upper and lower positions and preheat the oven to 350°F.

 Mark a vertical line down the middle of each cracker, being careful not to cut through the dough (again, this is for the traditional cracker shape). Using a toothpick or skewer (I like to use the blunt end of a wooden skewer for more dramatic dots), prick the dough to form two dotted rows about 1/2 inch for each side of the dividing line.
Bake for 15 to 25 minutes, until browned and slightly firm to the touch, rotating the sheets halfway through to ensure even baking.

Mallow Ingredients
1 cup confectioner’s sugar (a.k.a. powdered sugar)
3 1/2 envelopes (2 tablespoons plus 2 1/2 teaspoons) unflavored gelatin
1/2 cup cold water
2 cups granulated sugar
1/2 cup light corn syrup
1/2 cup hot water (You want it to be around 115°F, which takes about 15 seconds in the microwave. )
1/4 teaspoon salt
2 large egg whites (or meringue powder reconstituted according to the manufacturer’s directions)
2 teaspoons to 1 tablespoon vanilla extract


1. Lightly spray a 13- by 9- by 2-inch rectangular metal baking pan with nonstick spray, and dust it (bottom and sides) with a little confectioner’s sugar. (If you don’t have a pan that size, it’s fine to use a 10-inch square pan.)
2. Grab the bowl of your standing electric mixer (or just a large bowl, if you’re using a hand mixer), and pour in the cold water. Sprinkle the gelatin over the water, and set it aside to soften.
3. Set a large saucepan on the stove, and add the granulated sugar, corn syrup, hot water and salt. Cook the mixture over low heat, stirring it with a wooden spoon, until the sugar is dissolved.


4. Turn up the heat to medium, and bring the mixture to a boil (without stirring it!) until your candy thermometer reads 240°F. This will take about 12 minutes.


5. Take the pan off the stove, and pour the sugar mixture over the gelatin mixture from Step 2. Stir it until the gelatin is dissolved.
6. Using an electric mixer (standing or hand-held), beat the mixture on high speed until it’s bright white, thick and nearly tripled in volume. (This will take about 6 minutes if you’re using a standing mixer or 10 minutes with a hand-held.)
7. Grab a separate bowl and a set of clean beaters or a whisk, and beat your egg whites until they just hold stiff peaks.
8. Add the egg whites and vanilla to the sugar mixture, and beat them until they’re just combined.

9. Pour the mixture into your prepared pan.
10. Sift 1/4 cup of confectioner’s sugar over the top of the marshmallow.
11. Pop the pan into the refrigerator, and let the mixture chill, uncovered, until it’s firm. This will take at least at least 3 hours, but you can leave it in the fridge for up to 24.


12. Take a thin knife, and run it around all four edges of the pan. Turn the pan upside-down onto a large cutting board. Then lift up a corner of the pan, and use your fingers or a knife to loosen up the marshmallow block so that it falls onto the board.

13. Cut 1 inch cubes, or get creative and use cookie cutters, biscuit cutters, or cut them in crazy shapes with the knife!

14. With the remainder of the powered sugar, coat the cubes so they are not sticky around the edges.

White, fluffy, deliscious cubes of mallow!

S'MORES GALORE!


3.31.2011

Mr + Mrs DIY pillow cases

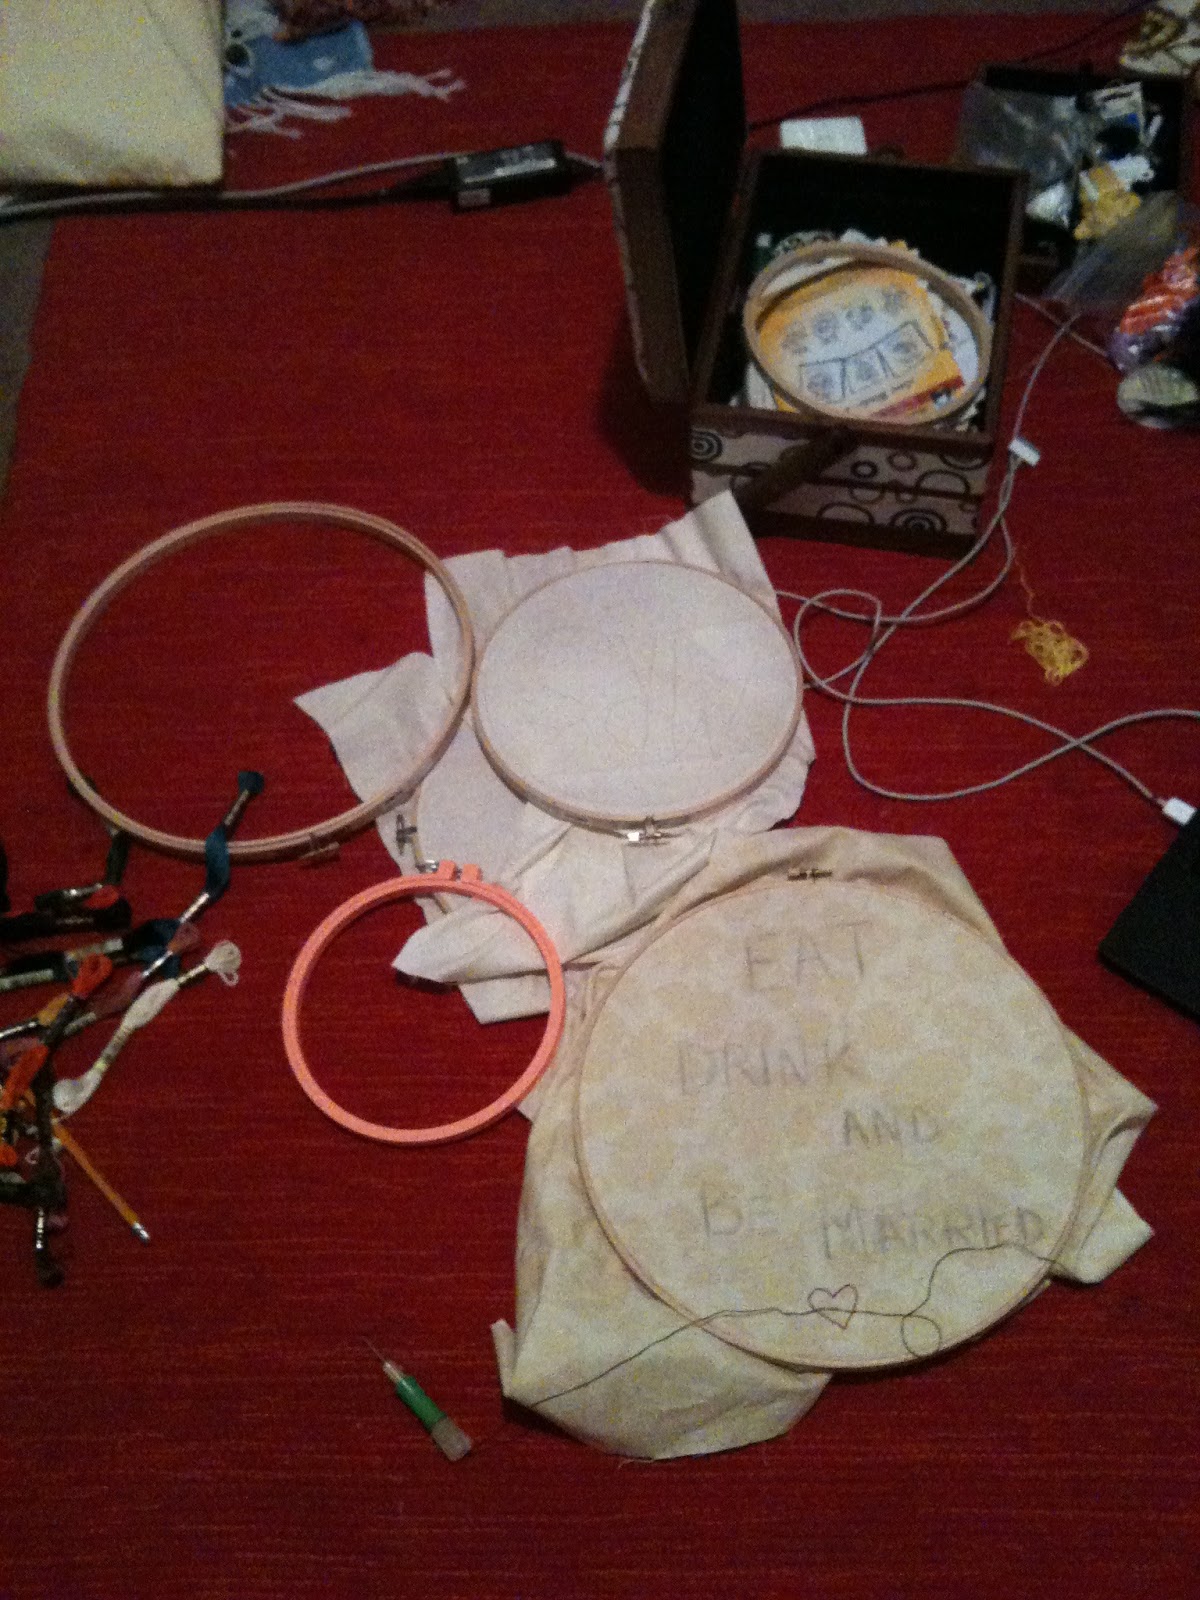
Last night my roommate and I set out to tackle some embroidery projects. Some for the wedding and some for after the wedding. : )

We worked on some embroidery hoops for the wedding...I'll post a separate DIY for those. they are pretty easy, and they look really cute!

And there is a post-wedding craft I am working on! MRS. is finished....now for that pesky MR.

Supplies
  1. Neutral colored pillow cases
  2. embroidery thread
  3. needle
  4. Letter stencils, pattern of pen to free-hand them
 First stencil or free hand your letters on to your pillow. Make sure the letters are big enough to span the whole pillow case. It is fun to experiment on paper different fonts, etc. I decided on a curvy, bold font.

Thread your needle (I usually use only 2 threads of embroidery floss rather than the whole string) and get to work on that pattern!

I use a cross between a chain stitch and back stitch, and it is hard to explain...so HERE are some videos that show you how to do different stitches!

Embroidery that pattern all the way around,tying a knot in your thread at the end in the back.

 Enjoy your newlywed, or monogrammed, or "quote" pillow...what ever you decide to embroider!

Sorry these DIY instructions are not the best, I hope you can follow them! If not contact me!

3.20.2011

{Guest Post!} Pink Champagne Cupcakes!

Comin' atcha a little late, but here is my good friend Natasha's recipe for delicious Pink Champagne cupcakes!

Natasha blogs about all her fabulous baking creations over at Natasha's Creative Confections...do stop here, go check out her other to-die-for desserts. You won't regret it, though your waistline might. : )
 RECIPE (Cupcakes)
2 cups white sugar
1 (3 ounce) package raspberry flavored gelatin
1 cup butter, softened
4 eggs, at room temp.
2 3/4 cups sifted cake flour
2 1/2 tsp. baking powder
1 cup milk
1 Tbsp. vanilla extract
1/2 cup raspberry puree made from frozen sweetened raspberries

Preheat oven to 325F and line muffin tins with cupcake liners.

In a large bowl, cream together the butter, sugar and dry raspberry gelatin until light and fluffy. Beat in eggs one at a time, mixing well after each. Combine the flour and baking powder; stir into the batter alternately with the milk.
Blend in vanilla and raspberry puree. Divide the batter among the cupcake liners. Bake for 15-18 mins (depending on your oven!), or until a small knife inserted into the center of the cake comes out clean.
Allow cupcakes to cool in their pans over a wire rack for 10 mins before removing to cool completely.
RECIPE (Frosting)
3 1/4 cups powdered sugar
1 cup butter, at room temperature
1/2 tsp. vanilla extract
4 Tbsp. champagne


With an electric mixer, beat together sugar and butter. Mix on low until well blended, and then on medium for about 3 minutes. Add vanilla and champagne, beating on medium for another minute.
The frosting is now ready, and you can frost your cupcakes any way you'd like. I piped them on using a sandwich bag by opening the bag inside a large glass, adding the frosting and then twisting the top as I held it. Cut a small hold in one corner and then pipe the frosting on in circles.
Add sprinkles or another type of decor :) 
 They are seriously delicious! Enjoy!

And thank you Natasha for your wonderful recipe! Now go check out her blog, and let your taste buds get inspired!
Love, Sav

2.11.2011

.::Weekend plans::.

This weekend is going to be amazing, I can feel like! I'v got a coffee/magazine browsing/sleepover date with...

This Girl!!


And then heading off to coffee in the morning with Natalie (see above) and Ali Lou on Saturday before Nat gets her hair did by Ali for Vegas + her 21st (finally!). But the fun doesn't stop there...

After Nat gets her hair did we are meeting up with her sister Kassie


Driving to Berkely, stopping along the way for some pretty important pit stops...
Anthropologie
IKEA
H&M
Buffalo Exchange
I'm lookin' for a red cotton dress for Valentine's Day and I won't come home without one!

Watch out Berkely here we come!

And finally we make it to Sunday...where my wonderful man is taking me to Francis Ford Coppola Winery. Wine, appetizers, romantic walk in wine country. Yes please!

What's in the forecast for your weekend?

1.31.2011

Lovely Sunday baby shower

Today my friend Natasha and I hosted a baby shower for our sweet friend Ivy at my house. It was so much fun to plan, decorate, and throw! Here are some pictures from the day with a DIY on Thursday for the "baby girl" banner. 

 Salvaged window pane, fabric banner, and last minute Polaroid bump pics. Momma-to-be is gluten free, so the cupcakes were AMAZING gluten free cupcakes by Betty Crocker, Natasha the amazing baker that she is whipped up some delicious cream cheese frosting to go on top. And they were adorable to boot.


Loved putting my old thrifted tins to use by displaying cuties in them. Yum!

This picture does not do the mountain of gifts justice. Another salvaged window pane with mini clothespins glued on for loose cards. Vintage fabric backing added last minute because I cracked one of the glass panes by sitting on it. Whoops.

The glare was so bright my livingroom has two huge windows and other smaller window in it, my apologies.  Ivy had the genius idea of having the ladies fill out thank you card envelopes AT the shower before cards and gifts got separated.

I was going to make a banner with the baby's name on it, but Ryan and Ivy are keeping that name a secret like they are in the CIA. Baby girl was the next best thing. I originally got this DIY from Ashley Ann, It will be my feature DIY this week on Thursday. 

 
The lovely, and TINY mommy-to-be. I think she has gained like 6 pounds.


And this picture because I love that Ivy looks like she is doing acrobats. You can see some more of the mountain of gifts. She is loved and blessed.

Wonderful day, over 30 people crammed into my tiny living room, delicious food, and gift giving galore.
Love, Sav