3.31.2011

Mr + Mrs DIY pillow cases

Last night my roommate and I set out to tackle some embroidery projects. Some for the wedding and some for after the wedding. : )

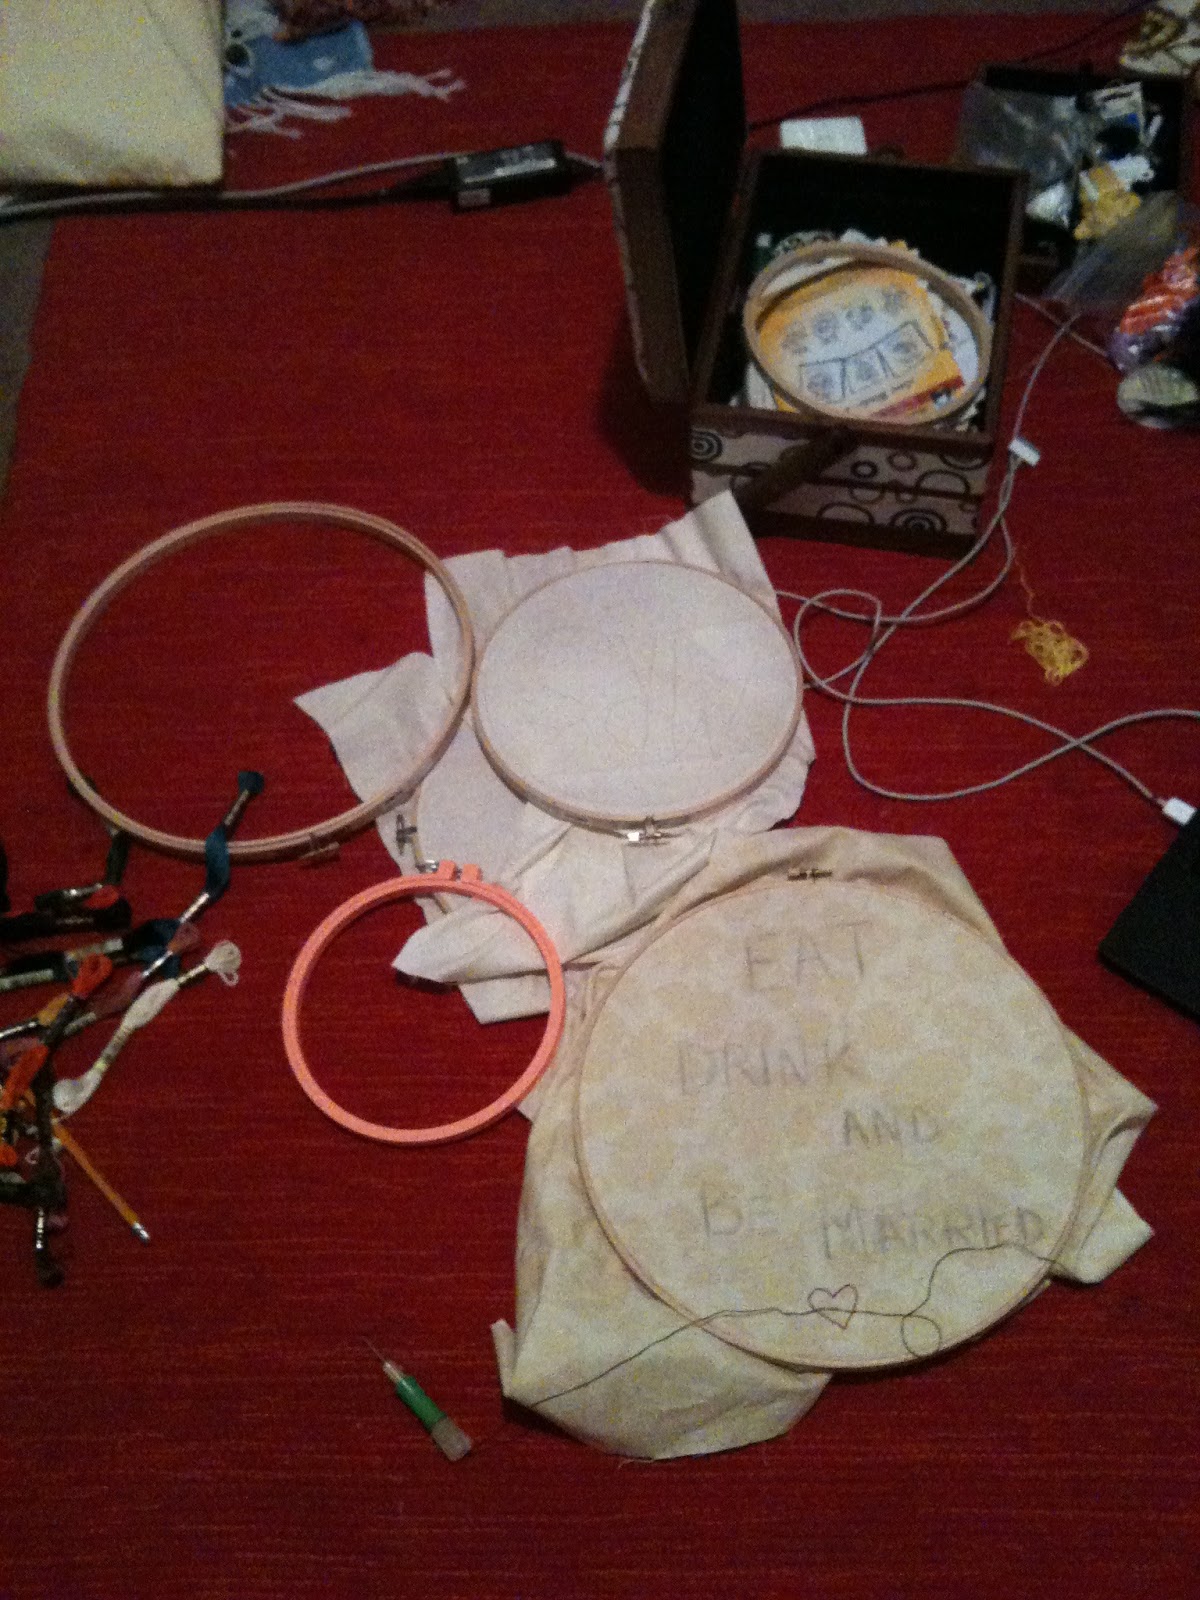
We worked on some embroidery hoops for the wedding...I'll post a separate DIY for those. they are pretty easy, and they look really cute!

And there is a post-wedding craft I am working on! MRS. is finished....now for that pesky MR.

Supplies
  1. Neutral colored pillow cases
  2. embroidery thread
  3. needle
  4. Letter stencils, pattern of pen to free-hand them
 First stencil or free hand your letters on to your pillow. Make sure the letters are big enough to span the whole pillow case. It is fun to experiment on paper different fonts, etc. I decided on a curvy, bold font.

Thread your needle (I usually use only 2 threads of embroidery floss rather than the whole string) and get to work on that pattern!

I use a cross between a chain stitch and back stitch, and it is hard to explain...so HERE are some videos that show you how to do different stitches!

Embroidery that pattern all the way around,tying a knot in your thread at the end in the back.

 Enjoy your newlywed, or monogrammed, or "quote" pillow...what ever you decide to embroider!

Sorry these DIY instructions are not the best, I hope you can follow them! If not contact me!

3.30.2011

Spring is here!

  Hello Spring.

I walked in the backyard today to discover a pleasant surprise! Flowers blooming!


Plans for this weekend: planting my Ranuculus flowers that half drowned in last week's storm...

They are just starting to come back after the storms and opening their buds..but a couple days they were a sad sight to see! Laying sideways in the driveway their dirt strewn all around. Haha poor things.
I will also be working on my above ground herb and vegetable garden!! I am so excited. For all you local folks I got this vintage apple crate at Manzana apple Orchard on Green Valley road. They sell old ones for $10 a piece. For those of you who are not local, I pretty much work in the heart of apple country, where Gravenstien apples are grown. So if you find an apple orchard go in and ask about old crates, they will probably be willing to sell you a couple! I am sure any fruit orchard has similar crates though!

Happy planting! Tell me about it...any flower or vegetable planting plans this month?


3.28.2011

Be Adventurous - Weekend in pictures.

This weekend was very full; I finally had time to craft, my parents threw Greg and I an engagement party, we saw our good friends Trebuchet play at an art gallery in town, and we got Greg sized for his ring.

Like I said...full weekend!

Mod Podge canvas collage I made for my living room.
It was supposed to be for a give-a-way on The Anderson Crew , but sometimes un expected miracles happen and their little girl from Ethiopia, Elsa, got to come home this last weekend! Praise God! So now it is hanging in my livingroom. Win, win.

Sitting in a sea of wedding crafts. I love it! My good friend Natalie helped me stamp the afternoon away!

Intense...sideways...game of Settlers of Catan.

Got some Goddaughter time in while her exhausted parents went on a dinner date. Love.

Hit up the thrift store with Natalie for 40% off Misc. day...got 2 vintage pyrex bowls in yellow and red, and this decanter for Greg and my 1920's Mad Men wet bar. : )

We had a "wedding cake topper" contest during our engagement party...love these little robots.

What did YOU do this weekend?

Also starting April 1st you can see my button over on the Blog Sugar web page. Blog Sugar is a faith-based blogging convention held in California in September...and IM GOING!
If you are a Christian (or even if you aren't) blogger than you should definitely check it out!

3.23.2011

Your new obsession...you're welcome.

All you crafters/art lovers/home decor enthusiasts...say goodbye to your free time. If you have not already discovered  


 you are about to.

It is invitation only...and I waited with bated breath for my invitation to arrive in my inbox...but I think it is less about exclusivity and more about server power right now, since they are just getting it up and running.

It is amazing! Basically it is like having an ongoing inspiration board at your finger tips. You have a little "pin it" button in your tab header and whenever something on the web inspires you you click "pin it" and it pops up with your different boards and choose which board to "pin it" to. I have boards for home inspiration, books I am reading, wedding stuff, etc. It is so fun and ADDICTING! 
Here are a couple examples I have on my "For the home" Pin Board.


And another one I pinned for my "Wedding Inspiration" board:


Try it, it is hard to explain here...just go check it out for your self!


Also...I shined my sink tonight just like Fly Lady told me to! Only the bathroom sink though...the kitchen sink had too many dishes in it. (But like isn't that the point?!)
Love, Sav

3.22.2011

DIY magazine holder

So the other day I was emailed by a friend who said her husband loves to read in the bathroom, but she is tired of the magazine mess around the toilet! : ) So here is a simple and CHEAP solution. Just tuck these bad boys next to the toilet for all those On-The-John readers in your life! They can also be made for a home office, living room, or desk!

Supplies
  1. Large cereal box 
  2. Contact paper or craft/scrapbook paper
  3. Mod Podge
  4. Paint Brush (one you don't LOVE, mod podge is hard to get off paint brushes)
  5. Scissors
  6. Pen
 Draw a curved line in your box and cut box on both sides

Cut craft paper or contact paper to fit box. Mod Podge craft/scrapbook paper or stick contact paper to box

Cut a small strip for the back and small strip for the front and stick or mod podge those on as well

Enjoy your new handmade magazine holder. Make matching ones, or mix and match colors. Have fun with it!

Tell me about your favorite DIY project you have done!

3.21.2011

DIY dinner party/wedding menus

Alright so obviously these are for my wedding, but they are definitely a cute dinner party idea too!

Supplies
  1. Library due date cards (i bought mine at  Knot & Bow on Etsy)
  2. Helvetica letter stamps (Michael's)
  3. Black stamp pad
  4. Due date stamp (bought on Amazon.com)
  5. Black pen 
Decide how you want your menu to look. I wanted MENU big at the top with the date of the event (Aug 06 2011 - my wedding) on the side under: Due Date)
Using stamp pad stamp each letter individually in the desired spot, add the date of the event with your due date stamp.

Below I created a sample menu, but in actuality all my menus are still blank, cause who knows what will happen with the catering!

*Sorry I used a crappy one that I was going to toss*
Enjoy your beautiful and unique menus and impress your friends with your DIY skillz. : )

3.20.2011

{Guest Post!} Pink Champagne Cupcakes!

Comin' atcha a little late, but here is my good friend Natasha's recipe for delicious Pink Champagne cupcakes!

Natasha blogs about all her fabulous baking creations over at Natasha's Creative Confections...do stop here, go check out her other to-die-for desserts. You won't regret it, though your waistline might. : )
 RECIPE (Cupcakes)
2 cups white sugar
1 (3 ounce) package raspberry flavored gelatin
1 cup butter, softened
4 eggs, at room temp.
2 3/4 cups sifted cake flour
2 1/2 tsp. baking powder
1 cup milk
1 Tbsp. vanilla extract
1/2 cup raspberry puree made from frozen sweetened raspberries

Preheat oven to 325F and line muffin tins with cupcake liners.

In a large bowl, cream together the butter, sugar and dry raspberry gelatin until light and fluffy. Beat in eggs one at a time, mixing well after each. Combine the flour and baking powder; stir into the batter alternately with the milk.
Blend in vanilla and raspberry puree. Divide the batter among the cupcake liners. Bake for 15-18 mins (depending on your oven!), or until a small knife inserted into the center of the cake comes out clean.
Allow cupcakes to cool in their pans over a wire rack for 10 mins before removing to cool completely.
RECIPE (Frosting)
3 1/4 cups powdered sugar
1 cup butter, at room temperature
1/2 tsp. vanilla extract
4 Tbsp. champagne


With an electric mixer, beat together sugar and butter. Mix on low until well blended, and then on medium for about 3 minutes. Add vanilla and champagne, beating on medium for another minute.
The frosting is now ready, and you can frost your cupcakes any way you'd like. I piped them on using a sandwich bag by opening the bag inside a large glass, adding the frosting and then twisting the top as I held it. Cut a small hold in one corner and then pipe the frosting on in circles.
Add sprinkles or another type of decor :) 
 They are seriously delicious! Enjoy!

And thank you Natasha for your wonderful recipe! Now go check out her blog, and let your taste buds get inspired!
Love, Sav

3.16.2011

My name is Savannah and I am a hoarder...

Not really. At all. But these pictures are not very convincing...


A box of glass jars?


Stacks of craft projects piled on top of each other?


A stack of old books?

No, I am not a hoarder...just planning a wedding. 

3.15.2011

Japan.


We are all shocked and humbled by what is happening in Japan. It is just not practical to hop on a plane and go over there to help, for most of us. I want to share some links you can go to to donate money to help the Japan relief fund.


Giving to charities is a great thing, but PLEASE, PLEASE be careful where you are giving your money. There are organizations I have researched and that I trust. People exploit tragedy for their own gain, so be smart and research where you money is going!


Psalm 34:18 "The Lord is close to the broken hearted and he rescues those who are crushed in spirit."
Love, Sav

Future home inspiration

Greg and I are in the process of assessing what we have and getting some new (used) stuff. Before he moves in on August 6th...well probably more like August 7th since we probably won't stay at home the night of the wedding. Buying furniture is hard. And expensive. Here are a couple dream houses of mine that I would love to have...and are working on in my own craft way...but don't have yet.


Home decor and style has always been a big love and inspiration of mine.  
Isn't the white industrial to die for mixed in with country chic? I'm crying. 

source 

Love the deep sink, pears in the windows and butchers block.


Love all the different patterns and colors on the plates. Swoon.
Love the wallpaper. 

I have collected a few pieces that I love, like my vintage mint green filing cabinet, my great-grandmother's hand embroidered 50 state (plus state bird, flower, capital, and year founded) quilt, vintage table, and large dark wood bookcase.

It will happen and I will make my house my home one day...but for now I dream. Of country chic mixed with eclectic vintage pieces. 
{sigh}

Love, Sav

3.14.2011

DIY monogram doily tote

***Wedding Spoiler alert***

I am sure you have seen these all over the inter-webs, like Ashley Ann's version, but I am going to share my version. : )  Bridesmaids beware your gift is below...sorry!


Supplies
  1. Blank canvas tote bag
  2. Large sized doily with circle in the middle
  3. Black (or any color) fabric paint
  4. paint brush
  5. Newspaper or something else to cover your painting surface
Gather your supplies and spread out your painting surface with newspaper or something to protect what you will be painting your tote on. (I needed the scissors because my doily had no center circle so I have to cut one our of paper and tape it on)

Put your doily on your bag, and starting painting the doily. Be careful that your doily doesn't slip around so that the paint only gets in the holes. Also don't add too much paint or the doily will soak through.

When you are done stencil or free-hand something in the middle, I chose an initial since I am giving them as bridesmaids gifts.

Keep it simple with just the initial like I did, or embellish it with buttons, fabric, or smaller doily patterns. Enjoy your new tote bag or make one for a friend!!