10.31.2011

An update and a Pinterest DIY


Learn how to make this skirt after an update:

As always this last month has been a whirl wind! The end of my quarter for nursing school is coming up so I have been crazy busy with exams, practical tests, and patient care. 

{AND}

You might remember my 2 preggo bridesmaids from OUR WEDDING a couple months ago, and they both gave birth this month...I have been a blessed and happy pseudo-auntie!

 {Charlie Sue}

{Hannah Louise}
Her momma blogs over HERE so check her out!


Needless to say I have been 
Cuddling
loving
swaddling
kissing
studying
For about the last two weeks. : )

I also have been painting, rearranging, crafting, and decorating our little home these last few weeks...with a few DIY projects thrown in from PINTEREST.

So here is my Men's Button up shirt skirt tutorial.
It's amateur at best, so hang with me!

 So lucky for me my husband was getting rid of clothes this weekend. 
I have been dying to try the men's button up turned skirt DIY, so this was perfect!

So cut right underneath the armpit from one side to the other

Now I didn't dare document this part because my sewing machine is a beast (see last post) and I am praying Baby Jesus sends me one for Christmas...but the "skirt" will be way to big. So there are a couple options:

cut it along the back lengthwise, pin it and sew it to a proper fit, take it in on either side, or sew a border on the upper edge and add a drawstring. 

Final product...I was pleased!

There are a lot of buttons going on in this outfit...and for this I apologize. : )


Anyway this was super simple and fun!

What Pinterest crafts have you done or are dying to try? Link them up in your comments!

10.14.2011

My sewing disaster.

So a couple weeks ago was my friend's birthday.
I know she is the kind of gal that would appreciate a handmade gift...so I decided to make her a tote bag.

Everything was going find. The fabric was cut, the design was dreamed up in my head and the first row of stiches were beautiful and straight.

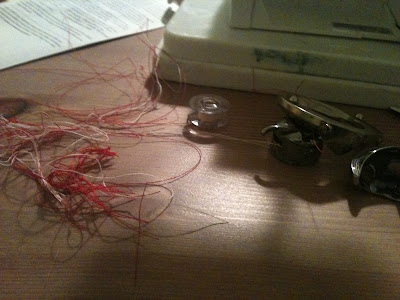
Then the bobbin went crazy. The string from up top wrapped around the bobbin like 30 time and I had a huge cluster of thread and an unfinished tote bag.

 See how innocently it started out?!


The culprit.


This was another disaster...realizing I had pale pink thread on top and bright red thread on bottom.
barf.

The fury.

I quit.

I would LOVE to hear about a crafting fail you had...
It will make me feel better.


10.12.2011

DIY Stag Canvas

So you may have seen this over on one of my besties blog Ballpoint + Pen this DIY, but I loved it so much I had to make one of my own!

{DIY Stag Canvas Art}


I love my little stag!

First of all you can find the template HERE.

Supplies
1. Blank canvas
2. Scrapook paper
3. Stag Template
4. Scissors
5. Paint/Paintbrush
6.Adhesive 

Glue scrapbook paper to canvas. I was lucky and the scrapbook paper was exactly the same size as the canvas. Lucky me! 

There are many ways to transfer the image to the canvas. I chose to cut it out, stencil, and paint because I like mixing medias and textures and not just using all flat paper.

Trace the image onto your canvas.

Paint the  traced image, hang up, and enjoy!

It is now hanging in our bedroom...I am so in love with it!
So simple, you could always add words as well.


In other news...look what Greg and I snapped for Friggity-Free from our church last Sunday.
Swoon.

10.07.2011

Happy Friday!


This week was insane. Beyone insane. I had a theory exam, a practical exam (showing how to properly insert a feeding tube and urinary catheter...fun stuff!) clinical rotation, 2 papers to write, a nutritional assessment to complete and another assignment my whole clinical group had to re-do.

Whew. 

So I am exhausted! Glad it is the weekend! Have fun peeps and I have more for you in store next week!


Love, Sav

10.02.2011

In honor of Fall...Chocolate Chip Pumpkin Bread

Nothing says Fall like a baked good chocked full of pumpkiny goodness. Coincidentally one of Greg's favorite things is baked goods chocked full of pumpkiny goodness!

So in honor of Fall and my husband whom I love so dearly, I present:

Chocolate Chip Pumpkin Bread


Pre-heat oven to 350 degrees and grease a 9X5 inch loaf pan. 
**disclaimer:This recipe takes about an hour and a half start to finish.**
I halved this recipe so the measurements are a little strange, if you are better at math than me you can probably figure out a better way to write them! : )


Ingredients
1 1/2 C sugar
1/2 can pumpkin puree
1/2 C vegetable oil
1/3 C water
2 eggs
1 1/2 + 1/4 C flour (see what I mean with the weird measurements? Haha the original recipe had 3 1/2 C)
1tsp cinnamon (or more, I put in more)
1 tsp ground nutmeg (or more!)
1 tsp baking soda
3/4 tsp salt
1/2 cup miniature semi-sweet chocolate chips

Combine sugar,eggs, water, oil, and pumpkin to stand mixer or bowl with hand mixer.

Combine the rest of ingredients (minus the chocolate chips) in a large large and whisk together

Add dry ingredients to pumpkin mixture and mix until well combined.

Add the chocolate chips to pumpkin mixture, 1/2cup is a rough estimate. 

This just looks like Fall/Halloween to me!

If you have not greased and floured your pan, do so now...I'll wait.

Fill your loaf pan with your pumpkiny goodness. And try not to eat half the batter, like I did.

Pop that loaf in the oven and try to find something to do for an hour so you don't park it in front of the stove salivating and wishing the light sprinkle outside would turn into a torrential downpour with flash-flooding so that you would have nothing better to do than sit inside and eat chocolate chip pumpkin bread alone on your kitchen floor all afternoon

...oh a girl can dream...

You know how the old saying goes "a watched loaf never rises" or something like that...

 so set your timer for 1 hour and stay out of the kitchen.


 There are so very many things wrong with this picture. Namely it is on it's side, and the bread has already been cut into. I apologize for both of these things, but there is no staying sane and taking good pictures when you have a piping hot loaf of pumpkiny goodness on your counter.

Enjoy!

10.01.2011

Must try photo apps + Tutorial

So I know not everyone owns an iphone, but I think most phones these days have apps you can buy...well here are some of my favs!

{Instagram}


Instagram would of course be my top pick. It takes all your photos and gives them that vintage look, and so many diferent styles. Make iphonography interesting and fun!

{Phonto}

My newest FAV app is Phonto. One of my besties, Ali from Ballpoint + Pen was over the other day and showed me it's wonders! 
It allows you to add captions to your photos and links up with instagram and your iphone photo library so there is pretty much seamless transition between picking, tweaking, vintage-ing and posting pics. LOVE IT!

This may be my all time favorite picture of my husband. God, may I please please pop out babies this adorable and chubby? Amen.

This is my absolute favorite picture I have made with Phonto. From our Honeymoon!

{Pic Stitch}


This app is also a new favorite! Collages galore! And you know I love myself a good collage!

Food.

Coffee.


Baby.

Mr. Horton

Ok, folks and here is the coolest part about all these picture apps!

They all interact with each other seamlessly!

{Instagram-Phonto-Pic Stich Tutorial}

 
Step 1: Take your pictures in Instagram. I chose the black and white setting, which actually is not normal for me. But I thought it would look cool for this project.


                Step 2: Next Open your pictures in Phonto one by one, and add the words you want to them.


Step 3: Choose a template on pic stitch and add in your Phonto pics. So fun!

All the pictures you take for each of these apps can be saved to you photo library, so you never lose the original or any of your steps, unless you choose to delete them yourself!

What are your favorite iphone/android apps that I should know about??